I’ve only recently begun to experience the fun of shooting with a 10-stop neutral density filter.
When you’re photographing landscapes, there are always challenges to face: too much light, not enough light, subjects that move around, and so forth. How you deal with the challenges has a big impact on your final images, and over a body of work, the way you face the challenges can define your style.
It pays to have a number of tools in your toolbox to give you as many options as possible, and one of the tools I’ve recently added has been that 10-stop neutral density filter that I mentioned above. What does that mean, exactly? Think of it as sunglasses for your camera. Neutral density filters block light, theoretically without changing the color of the light (thus the word, “neutral.”)
There are a range of neutral density filters available, and they start with densities of about one stop of light and range typically up to 10 stops (I’ve even seen a few that go up to 13 stops). 10 stops is quite a lot, and if we think of it in terms of exposure, it my become a bit more apparent.
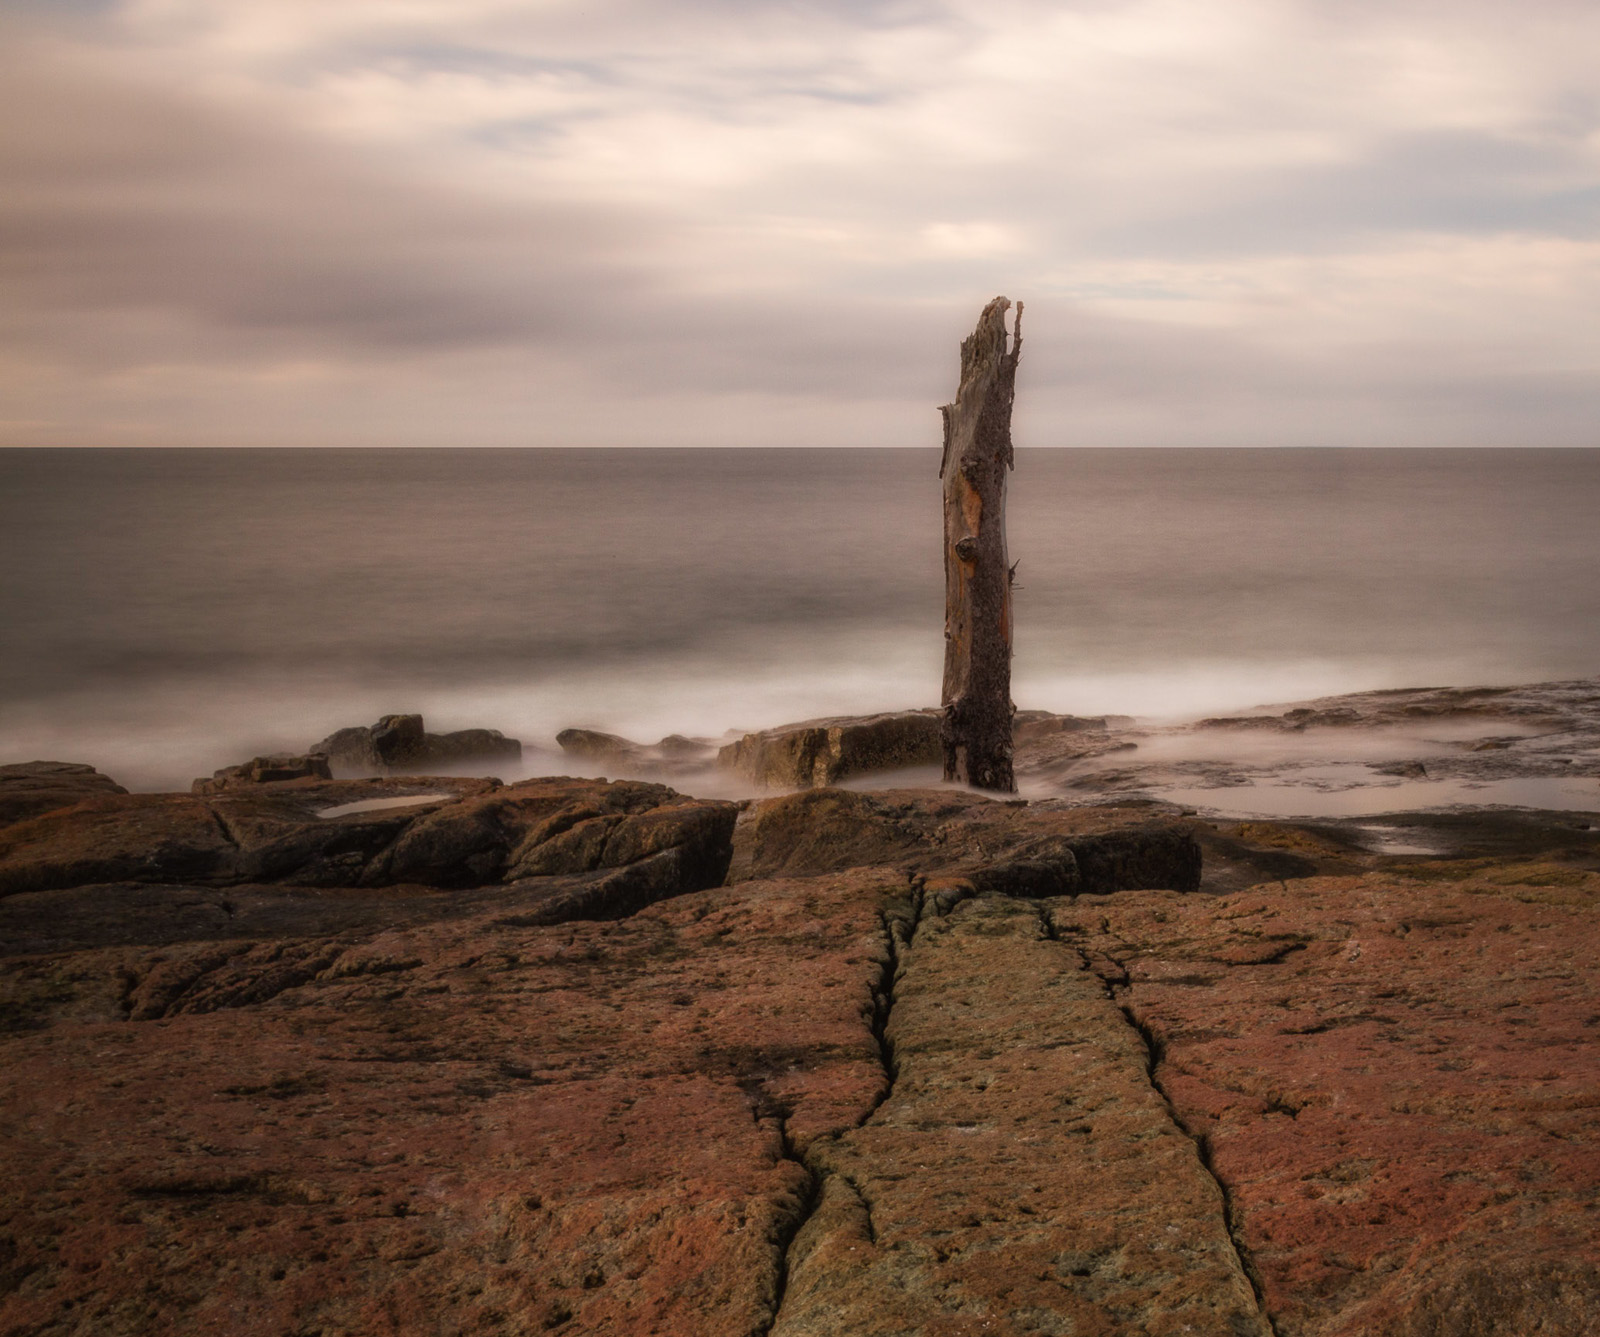
Here’s an image, taken at sunrise. This is 1/25 second at f/11, set to ISO 200:
Now, to get an idea of what 10 stops means, here’s the same image taken just a moment earlier. In this case, 10 stops means that we expose at 1/40 second at f/11. However, to get an extra long exposure, I went to f/16 and increased the shutter stop to 1/60 second. The difference is dramatic:

What’s happened? The slower shutter speed has allowed everything in motion to become a blur. That includes the water and the clouds, which works well for this image. It also includes things like birds flying through the sky, which are blurred out completely.
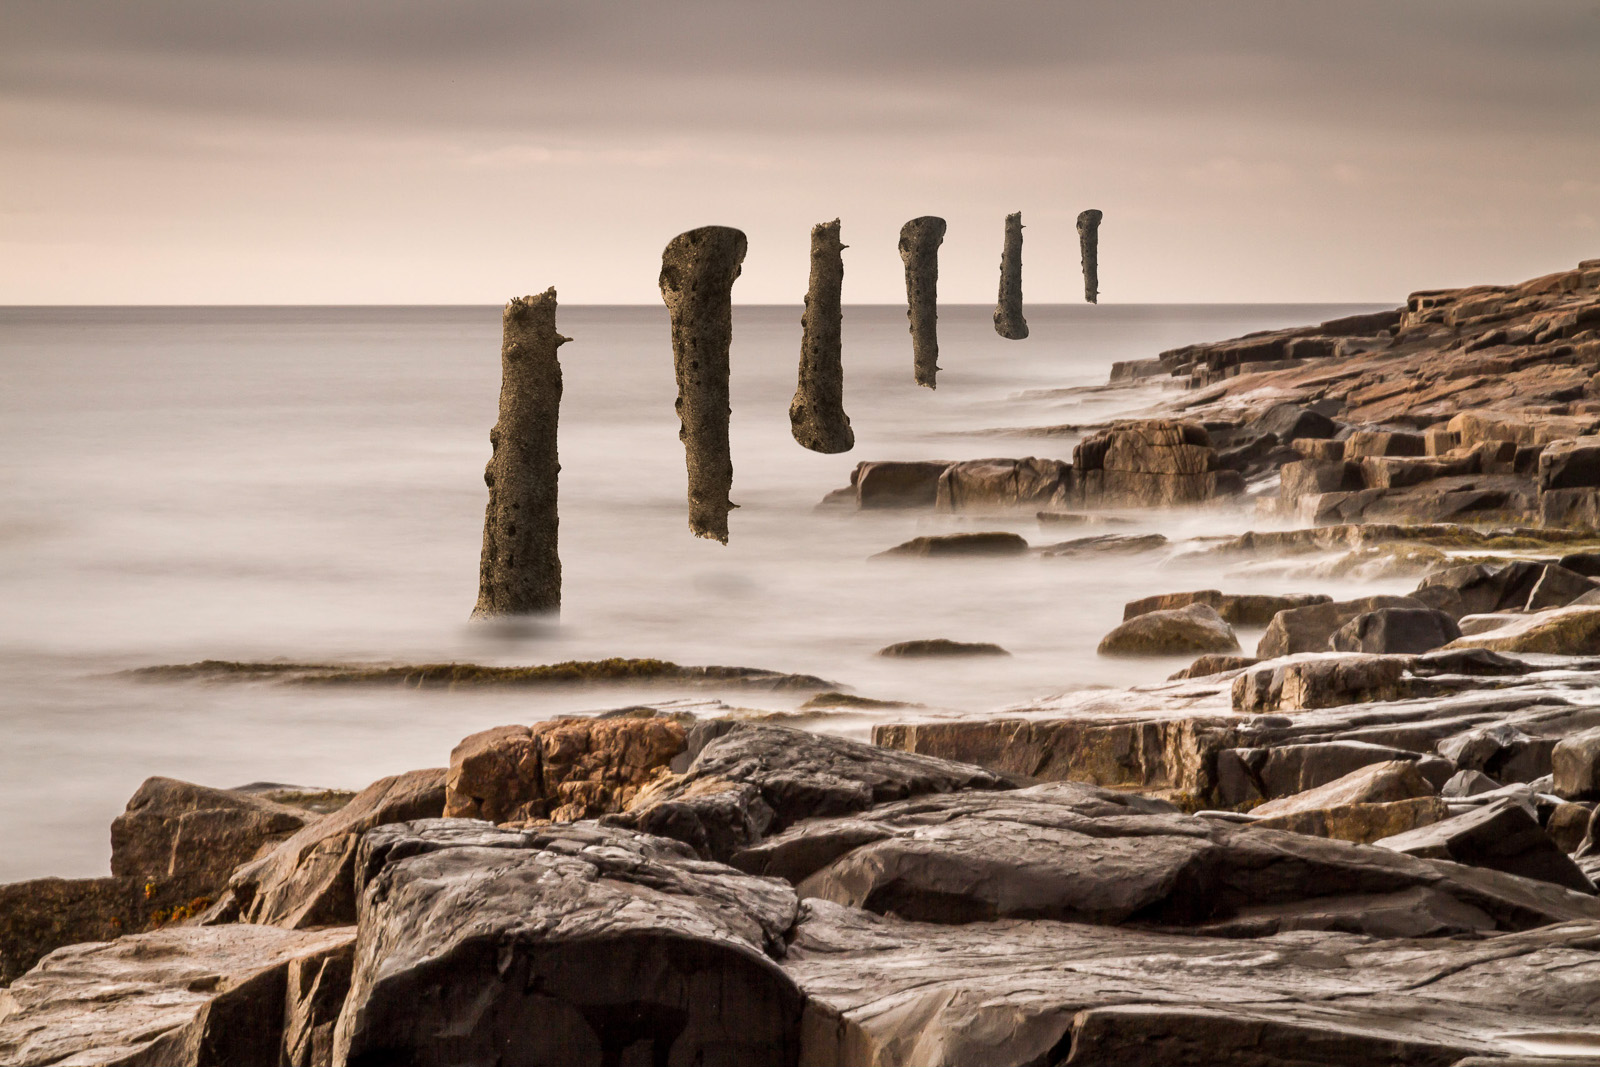
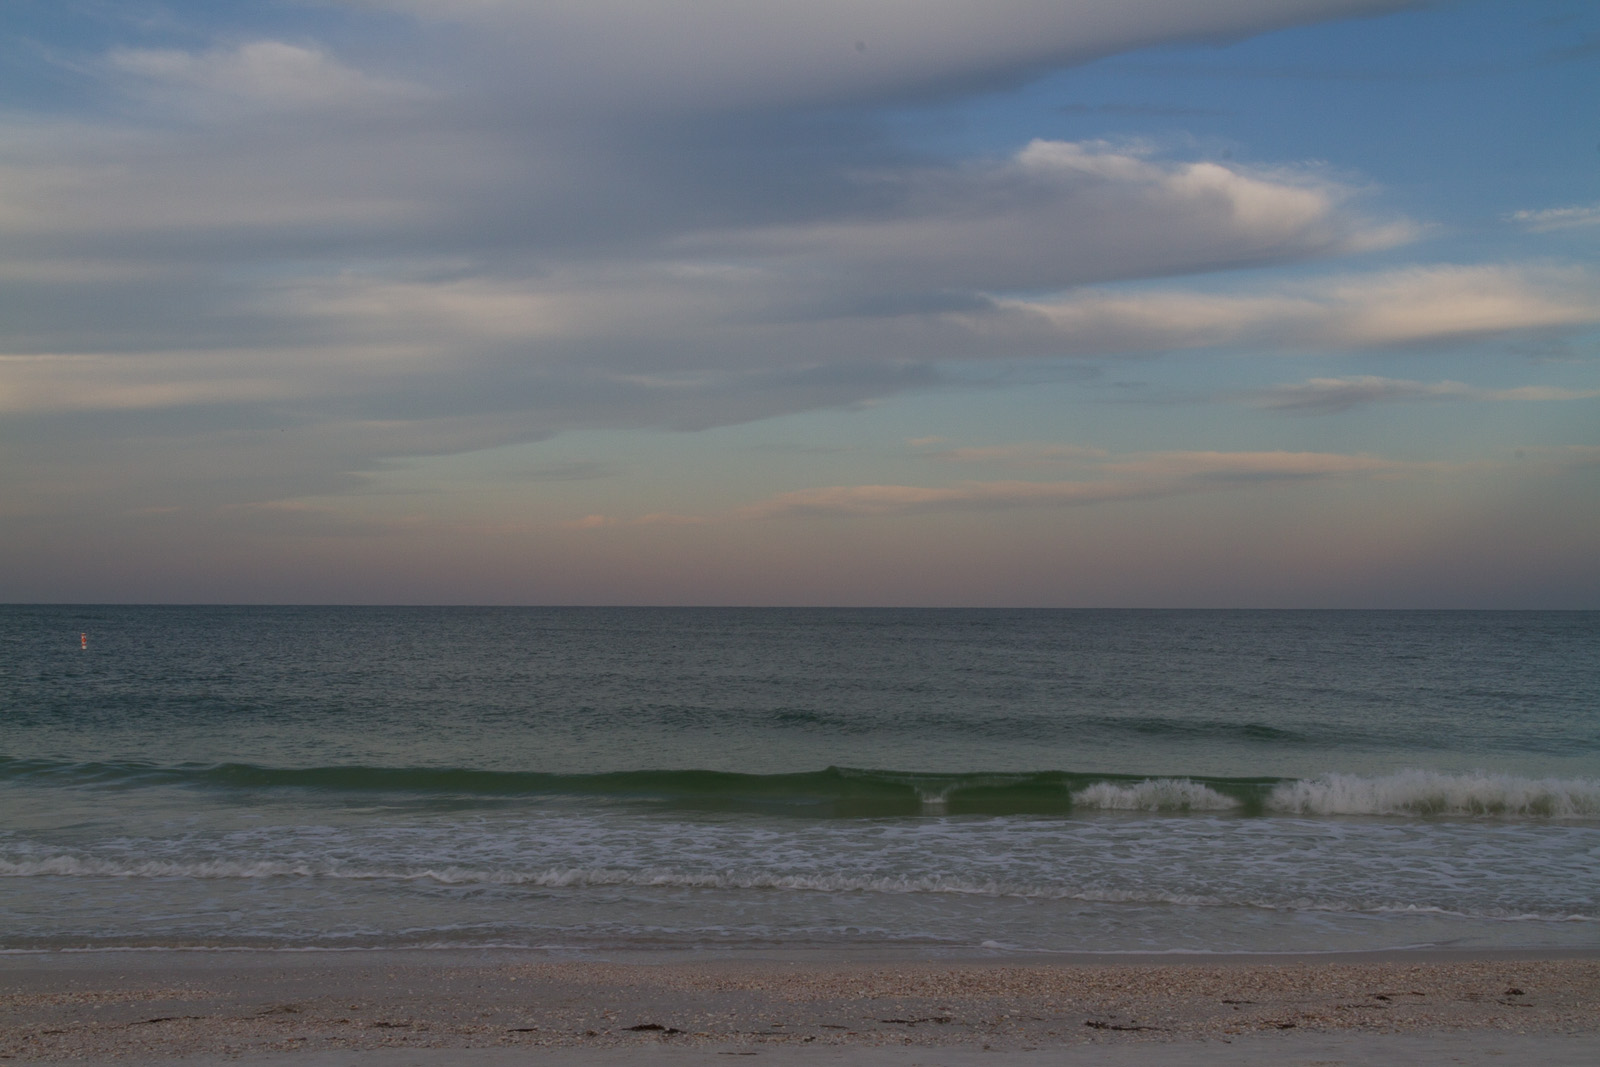
Here’s another example, taken later in the day. A normal exposure of the water for this image is 1/30 second at f/22, with the ISO at 200:
By adding the neutral density filter, with a 10 stop adjustment, we have a properly exposed image at 30 seconds, while maintaining the f/22 aperture and the ISO 200 setting:
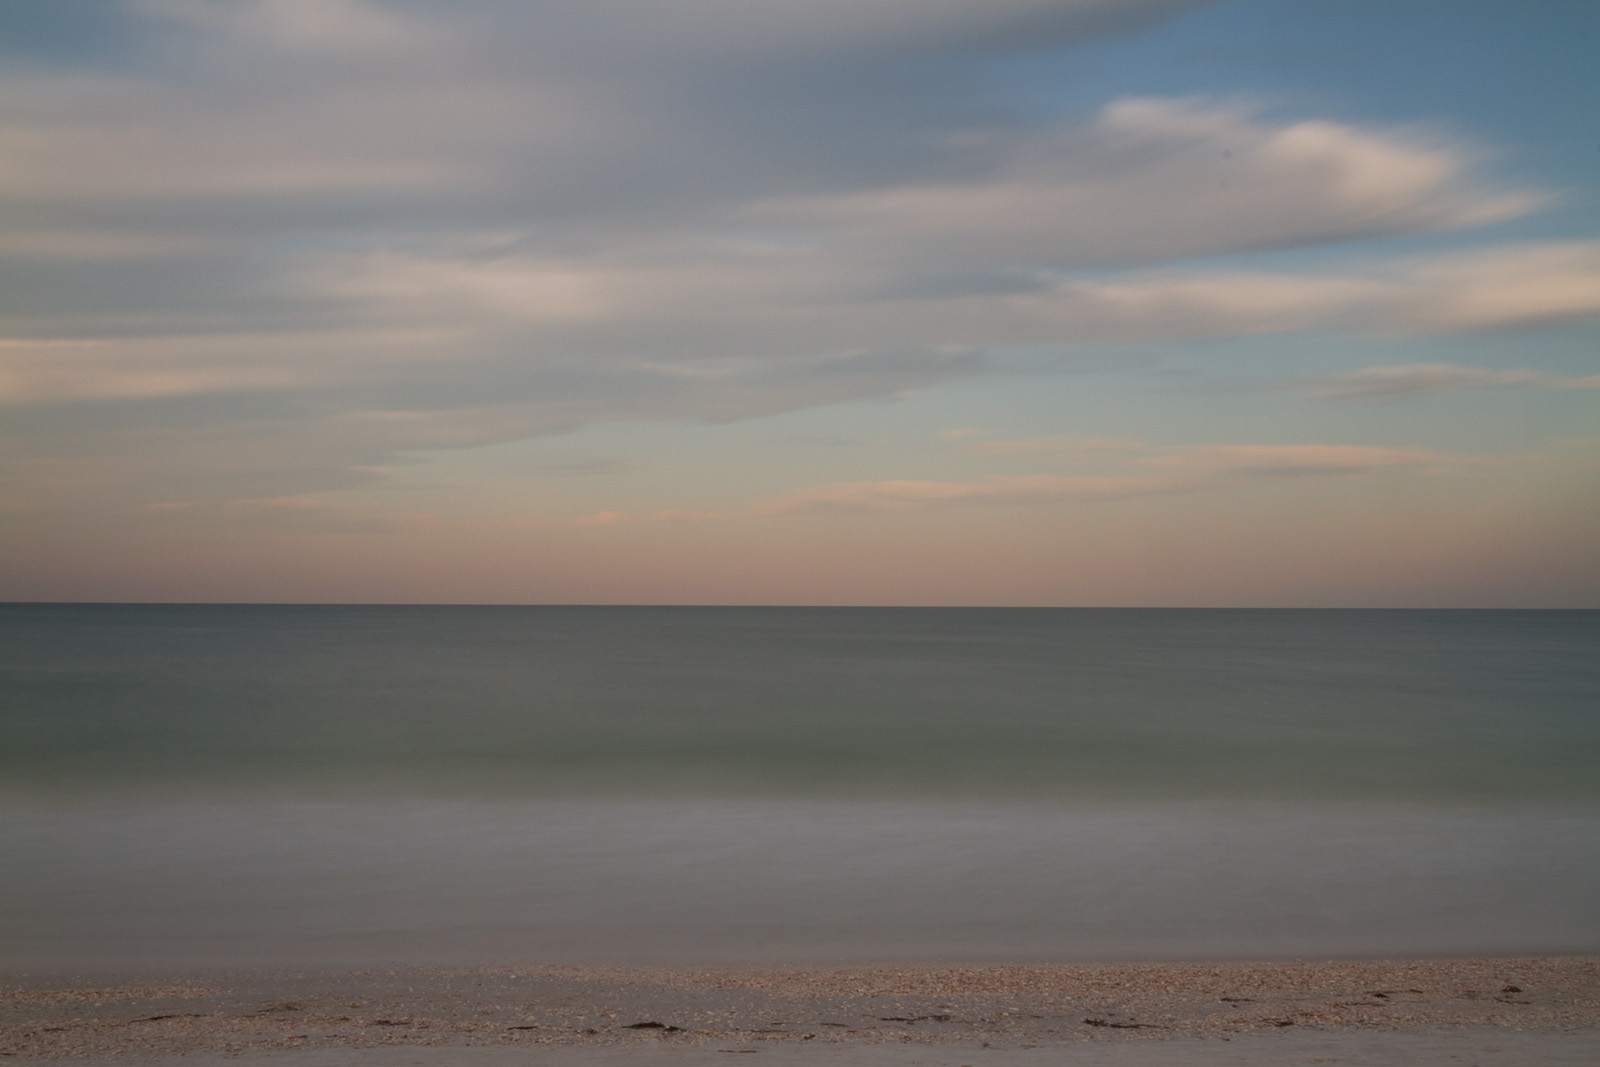
Now that is some smooth, silky water! The clouds have changed as well.
Using an ND filter can be tricky and a bit tedious. In most cases, the autofocus and perhaps even the autoexposure may not work. So, to take an image like this, you first compose and measure without the filter on your lens. Note the exposure settings, then switch to manual mode and dial in the same settings.
Then, adjust the exposure 10 stops. You can find a variety of apps or tables on the web to calculate 10 stops, or you can dial it in by hand (that’s 30 clicks of the exposure dial on my Canon 7D). Then, place the ND filter on the camera, and take the photo.
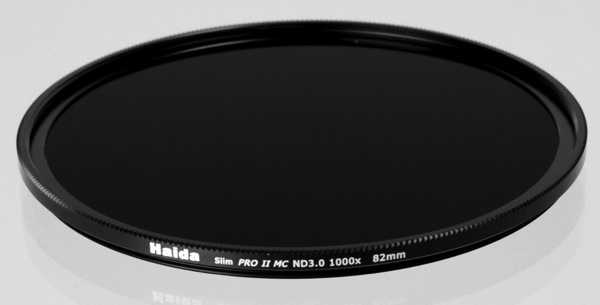
There are a couple of different options for ND filters. I’m using a Haida filter that screws onto the front of my lens. It’s relatively inexpensive, and I’ve been having a lot of fun experimenting with it.
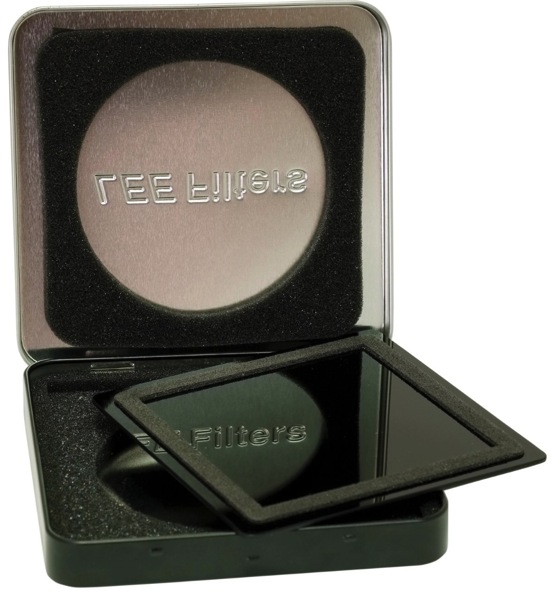
There is another style of filter, exemplified by the Lee Big Stopper. This is a rectangular filter that attaches to a special mount. The advantage of the Lee mount is that you can slide the filter in and out of the mount much more quickly, compared to the screw-on type of filter that I have. The downside is that the cost is significantly higher.
Regardless of the style of filter, the neutral density filter offers an alternative way to capture images and broaden your creative efforts. I’ve really enjoyed the different looks I’ve been able to get with my 10-stop ND. I’d encourage you to buy or borrow one and see what it can do for you, too.