Adding a stroke to a layer is pretty straightforward in Photoshop. The capability has been around for a long time. But did you know that it’s now very easy to add multiple strokes in Photoshop CC? The Layer Styles dialog box now has options to create more than one stroke. Let’s see how it works.
As an example, I’m using this simple document, with text on a layer above the background.

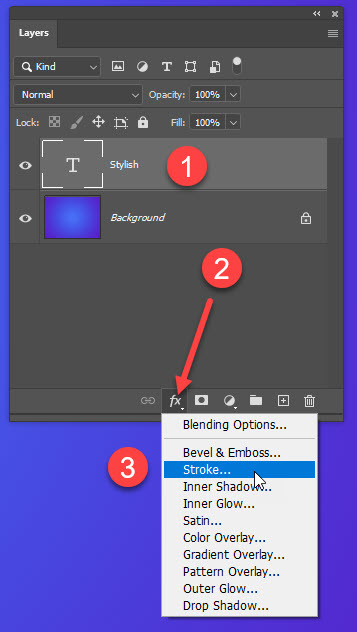
We’ll add a stroke by the usual method:
- Make sure the text layer is selected
- Click the “Add a Layer Style” icon, and
- Choose Stroke:
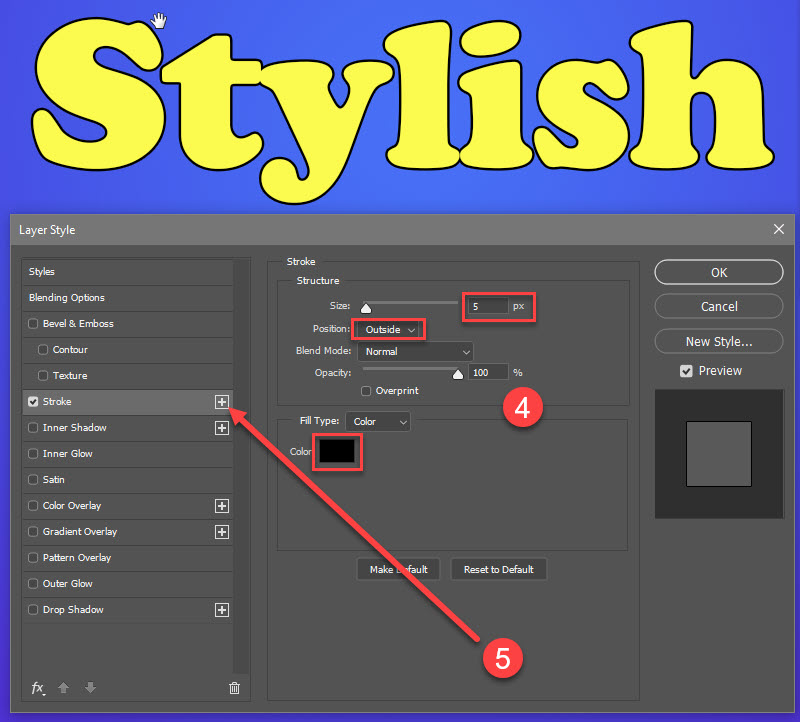
Now, we’ll customize the stroke appearance:
- Set the size to 5 pixels, Position to Outside, and the Color to Black.
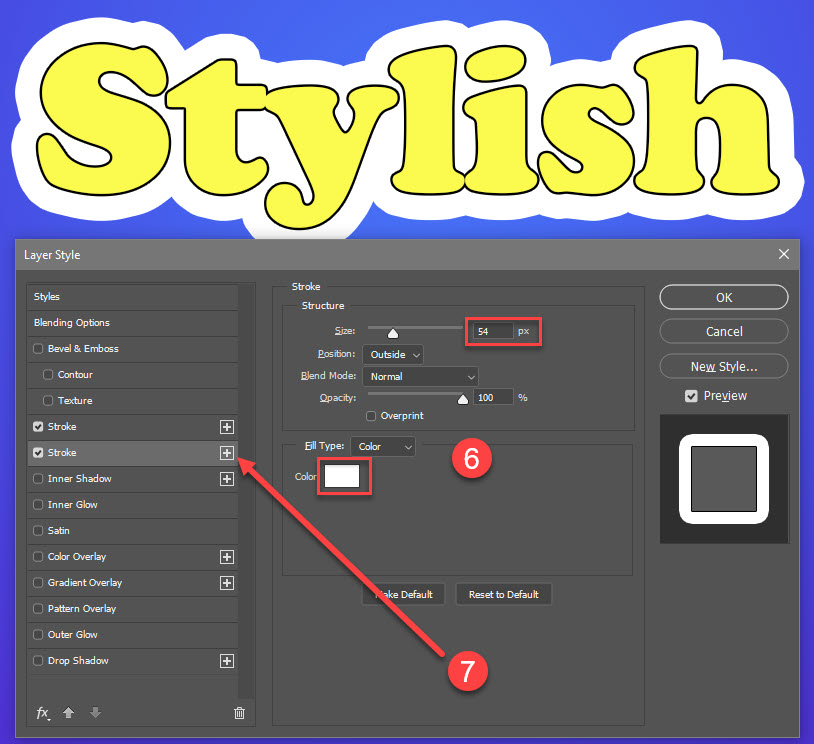
- Next, Click the “+” sign next to the Stroke Style.
Now we have a second stroke on this layer, but the appearance is copied from the original. We’ll need to change this.
- Change the color to White. Adjust the Size until all the gaps are filled in. I used 54 pixels in this example.
- Now, click the “+” sign again!
Continue adding additional strokes, modifying the color and size so that each stroke extends a bit further than the one above it.
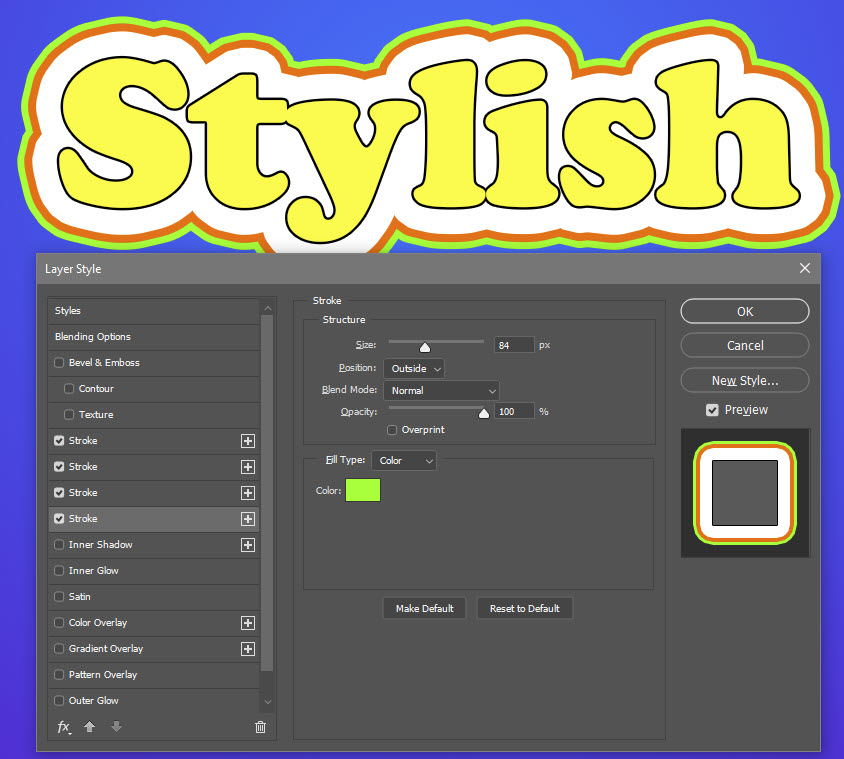
Don’t forget that you can change a stroke to appear Inside, instead of Outside. For thinner strokes to be visible, they need to be above the outside strokes. If you get them out of order, change the stacking order using the arrows in the lower left. This works just like layers.

Once you click OK in the Layer Style dialog box, you’ll see the multiple strokes in Photoshop CC in the Layers Panel. You can double click these to reopen the Layer Style dialog box and make further changes, if desired.
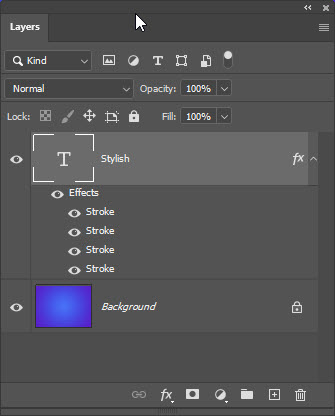
The great thing about creating multiple strokes in Photoshop CC this way, is that the Layer Styles remain dynamic and editable, and change if the text changes. This works even if the text is transformed. For example:
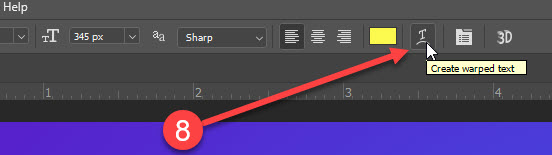
- With the text layer active, click the toolbar button to “Create Warped Text.”
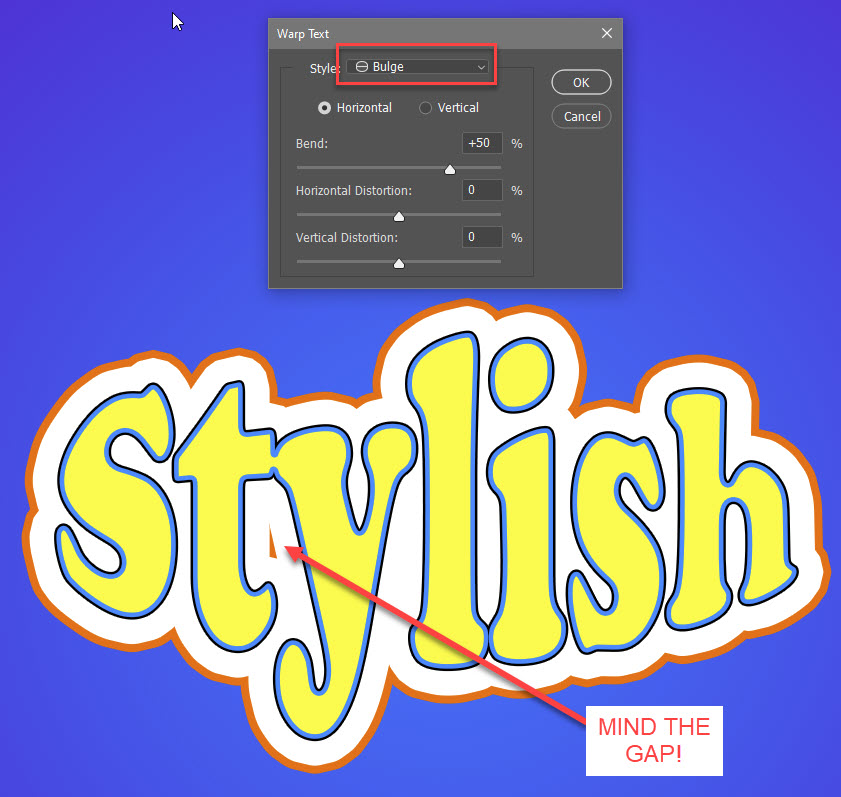
Now choose a Warp style. Here, I’ve selected “Bulge.” Notice that with the warped text, we have a gap in the stroke between two letters.
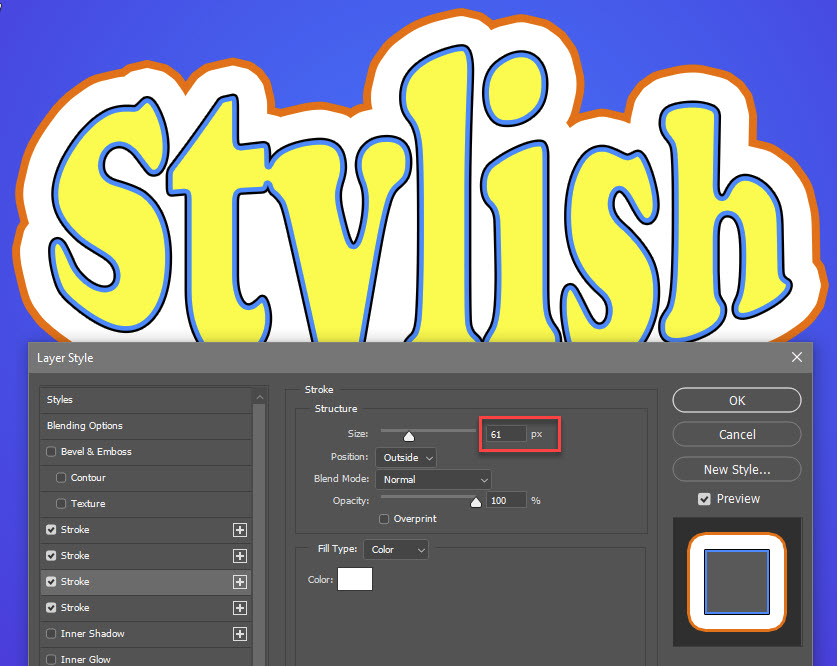
Since this is a Layer Style, we can simply double click the Stroke style in the Layers Panel to reopen the Layer Style dialog box, and bump up the white and orange strokes to a higher value to fill in the gap and maintain the original appearance. That’s pretty painless!
Notice that many of the other styles in the Layer Style dialog box also have “+” signs next to them. This is an indication that you can add multiples of those styles, too. The sky’s the limit!
For more on things you can do with Layer Styles, check out some of my other tutorials over at TipSquirrel, such as this technique for carving rock with layer styles.